Find out how to build a loft bed with desk. You’ll love the price, function, and space-saving this twin DIY loft bed offers!
What makes bedtime, homework, and a tidy room more fun for a child than a fabulous DIY loft bed with desk and storage?!
If you are short on space, but looking for a fun and functional bed for your child, everyone will LOVE this loft bed with built-in desk.

When it comes to kids there’s no question…everyone wants the top bunk!
But what if you don’t need two beds?

Keep the best part (the top bunk) and replace the bottom bed with a fabulous desk and bookcases to create this amazing DIY loft bed!
Building your own loft bed allows you to create exactly what you want. The loft bed plans below are perfect for boys, girls, tweens, teens, and even adults!

With a twin size bed on top and space for a complete office on the bottom, all you need is your favorite paint color (or stain) and decor to create the bed and desk of your dreams.
Oh and did I mention it’s only about $350 in lumber to build?!

It was my daughter that our loft bed was built for.
Soon my little guy will be moving into my older son’s room and we’ll be building them bunk beds, so we had to keep things fair and give her a bed that was up in the air too of course 🙂
So, I started looking for loft beds for kids. And what I found was they weren’t cheap! In fact, loft beds with desks were around $1,000…YIKES!
You know my motto…if you can make it cheaper than you can buy it, it’s time for a DIY project!
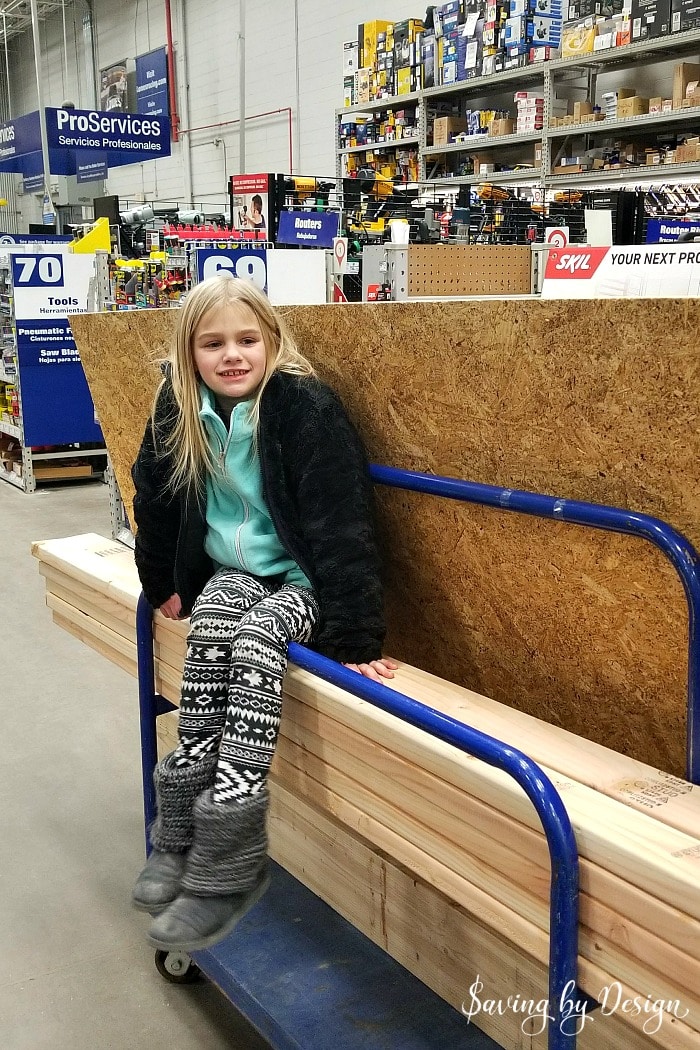
It’s safe to say she was a little excited about her new bed!
Materials Needed
Loft Bed
- 10 – 2x4x8
- 3 – 2x8x8
- 4 – 2x6x8
- 4 – 2×2 furring strip
- 1 – 1/4″Plywood 4×8 sheet
- 1 – Finished plywood 4×8 sheet (optional)
- 6 – 1x4x8
- 3″ screws
- 8 – 5/16″ x 2-1/2″ Lag bolts
- 8 – 5/16″ Washers
Desk and Storage
- 5 – 1x4x8 (plus left over from loft bed)
- 1 – 1x10x12
- 5 – 1x10x8
- 2″ screws
- 1-1/4″ screws
- Construction adhesive
Tools Needed
- Drill
- Miter saw (or)
- Circular saw
- Tape Measure
- Socket for lag bolts
How to Build a Loft Bed with Desk
A few tips for building your DIY loft bed…
- Make sure to pre-drill all holes when screwing your boards together to prevent the wood from splitting.
- As you can see from the finished photos above and below, we knew we would be painting our loft bed white, so we chose to use white primed wood for the railing and bookcases. There is also unprimed, regular wood available if you plan on staining your loft bed.

To get started, we cut the four 2x4x8’s and four 2x6x8’s to 80″ in length.
We made four posts by fastening together one 2×4 and one 2×6 for each post as shown in the photo above. We used 8 screws per post.

The 2x8x8’s were cut into two 42″ pieces and two 75″ pieces.
To start assembling the bed frame, we first attached two end posts using a 2×8 cut at 42″. The top of the board was placed at 66″ from the floor. Make sure to use a level to account for any uneven floors 😉

The steps above were repeated for the other end posts.

A 2×4 was also cut at 42″ and screwed into the bottom of the posts about 12″ from the floor for additional support until the desk and bookcases were added.

Next the two end posts were attached together using the 2×8 cut at 75″ with the top of the board placed 66″ up from the floor.
Additional screws were also added in each corner for support.

Three of the 2x2x8 furring strips were cut into two 36″ pieces and two 75″ pieces to match the inside dimensions of the bed frame. One furring strip was reserved to be used as ladder rungs.

The furring strips were attached with screws by placing them flush to the bottom of the 2×8 frame.

For even more support we added 2-1/2″ lag bolts with washers to each post corner.

Although not necessary, since there should be enough room for the mattress to fit, we recessed the lag bolts.

Three 2x4x8’s were cut into six 39″ pieces and placed across the frame for mattress support about 12″ apart.
They were attached with screws to the furring strips.

Utility plywood was used for mattress support since we were using a foam mattress. (Here’s the mattress we have. It’s perfect and super comfy!!)
The plywood was cut at 39″ x 75″ to match the inside bed frame dimensions.

To make the ladder, first two 2x4x8’s were cut to 80″ in length to match the post height.
They were then attached to the bed with screws from inside the bed frame (back of the ladder) so no screws would be showing on the outside of the ladder.
The width of the ladder (between the 2×4’s) was 12″.

The reserved 2x2x8 furring strip was cut into 15″ pieces to be used for the ladder rungs.
We used four rungs placed 12″ apart with the top one being placed 12″ down from the top of the bed frame.

To make the railing six 1x4x8’s were cut into four 42″ pieces, two 60″ pieces, and two 77″ pieces.
We placed the top rail flush with the top of the posts and then placed the lower rail half way between the top rail and the bed frame.
They were attached by screwing them to the inside of the posts.
If you would only like a loft bed without the desk and bookcases below it you can stop here 😉

We attached a piece of finished plywood under the bed to create a nice “ceiling” under the loft.
The plywood was cut at 36″ x 72″ and was attached to the 2×4 mattress supports above it using finish nails.

The small bookcase was built using 1x10x8’s. Two pieces were cut at 30″ for the sides and three pieces were cut at 40-5/8″ for the shelves.
The bookcase was built separately using 2″ screws before attaching to the bed frame.
The bottom shelf was placed 3-1/2″ from the floor. The middle shelf was placed 16″ from the floor. The top shelf was placed flush with the top of the sides.
To attach the bookcase to the bed posts, 2″ screws were placed from inside the bookcase corners.

The large bookcase (on the ladder side) was made using the 2x10x12 cut into two 58-3/4″ pieces and three 2x10x8’s cut into five 40-5/8″ pieces.
Again, the bookcase was built separately using 2″ screws before attaching to the bed frame.
The bottom three shelves were made to match the small bookcase – The bottom shelf was placed 3-1/2″ from the floor, the middle shelf was placed 16″ from the floor, and the third shelf was placed 30″ from the floor.
An additional shelf was placed at 42″ from the floor and the top shelf was put on flush with the sides.
To attach the bookcase to the bed posts, once again, 2″ screws were placed from inside the bookcase corners.

To build the desk, 1x4x10’s were cut into four 78″ pieces, one 69″ piece, three 23-5/8″ pieces, and one 10-1/2″ piece. You’ll also need two 12″ pieces from your scrap pile to use as supports for the desk.
To assemble, lay the four 78″ pieces upside down on a flat surface next to one another to form a tabletop.
The two 12″ support pieces were attached using 1-1/4″ screws so they spanned the 4 boards and held them together, approximately 24″ from each end.
Flip your desktop right-side-up and attach the 69″ piece so it stands up perpendicular to the back board, flush with the left end of the board, and flush with the bottom of the board. The right end of the back board will meet the large bookcase frame once the desktop is installed.

Using construction adhesive attach your desktop to the top of the small bookcase and to the third shelf on the tall book case.
We made a divider to “contain” the area where the desktop met the large bookcase shelf by cutting a scrap of 1×10 into a 12″ piece and attaching with 1-1/4″ screws under the third shelf.

The remaining section of desktop above the small bookcase was attached using construction adhesive and 1-1/4″ screws from under the top shelf like shown in the photo above.

After the loft bed with desk and storage was completely assembled, we painted it with Easy Care Ultra Premium Interior Paint in Egret with a satin finish.

It’s safe to say that my daughter absolutely LOVES her new bed!
And I love that we’ve created so much new storage to organize her books, toys, and more!

She also has so much more room now to play 😀


It even looks adorable at night!
Here’s the decor used for our DIY loft bed with desk and storage
- EmojiPals Bed-in-a-Bag Set
- EmojiPals Poop Sequin Pillow
- Multicolor Burlap Pennant Banner
- Large Collapsible Storage Basket with Cotton Handles
- Foldable Storage Bins
- LED Multicolor String Fairy Lights
- LED Touch Light
I hope this post helps you to build the DIY loft bed and desk of your (or your son or daughter’s) dreams!
Feel free to ask any questions in the comments below 😉
Happy DIYing!


Hello, I was wondering, what is the height of your ceiling and how much space is there between the top of the mattress and the ceiling? We’re designing a loft bed for our son and I want there to be enough room for us to sit up there comfortably to read books at night. Thanks for your help, I love the design!
Hi Lisa! I’m glad you like our bed and thanks for stopping by! 🙂
Our ceilings are 8 ft and we have 29″ from the top of the mattress to the ceiling. My kids can comfortably sit up the top, and I can too…but it’s definitely tight for my hubby to sit up there who is 6’3″.
We wanted to be sure we made it high enough so there was enough room for my daughter to still use her desk and storage as she grew without having to crawl over to her chair. Haha!
With the way we built our loft bed there is definitely enough room for that too…I just need to duck a tiny bit when walking under it and I’m 5’6″. There is tons of room when I am sitting at the desk 😉
That’s what I was juggling too: enough room up top vs enough room underneath (we also have 8′ ceilings). Thanks for the reply!
Hi. Thanks for the plans! Looks great and excited to get started. Do you think there will be any issue sizing this for a full size bed?
Hi. Thanks for the plans!! Can’t wait to get started.
I was looking to size this for a full size bed. Do you think there will be any issues with supporting a larger bed / area?
Thanks
Steve
I am also looking for the sizing for a full size bed
Hi Steve, did you ever end up making this for a full size? I’d love the adjustment help!
How much weight will this support?
Hi Ashley!
I’m not sure of the max, but I can tell you that my husband and kids have been up there together…so we’ve probably had at least 350 lbs up there 😉
Sooo cute! My daughter (11) has fallen in love with this bed! I do have a question regarding the mattress… we have an “old school” twin sized innerspring mattress plus a memory foam topper, so it is about 8 1/2″ total in height; would you suggest using 2×10’s instead of 2×8’s around the top where the mattress goes? Do you think the weight of our old school mattress would be supported or would we need more heavy duty furring strips? Thank you for such a fantastic DIY how-to!💕
What are the finished dimensions of the loft bed…length, width, and height? Thank you.
Hi. We are going to make this for my daughter. However we have 7ft ceilings. If we shorten it by 6-8 inches do you think she’ll still have an ok amount of space to sit under for her desk ? Thanks
I would like to know too
Is it a full size bed?
I built this bed for my granddaughter. Just a couple suggestions. First, when using 3” screws they came through to the other side when 2” boards were abutted. I had to back out many many screws. I’d suggest using 2-1/2” screws on many places. Second, the wood needed for completion of the desk top is not included. Fortunately I had leftover scraps to fill in that space. Otherwise the bed came out beautiful and she loves it. Her room is very narrow so I located the tall bookcase outside the frame. I also added a shelf on top of the bookcase to provide for a shelf at bed height for a lamp, clock, water glass and tablet.
Hi Kara,
Beautiful bed! Can you tell me how long it took to build? Can it be built elsewhere and maybe assembled later in the chosen location? You are so right about the costs and the availability of this type of bed. Thank you so much for your Blog and DIY plans.
Our bedroom ceilings are low . 7ft
How much space should there be between the ceiling and top of bed?
Kara,
Just curious if the desk segment sags at all? Using the 1”x4” boards to span 58” between each set of shelves seems far without extra support.
Thanks in advance.
Ben
Hi. I made this bed with 8 foot ceilings and it is simply not enough space on top of the bed for me. I can’t sit up at all and now there’s going to be 8 inches sawed off the legs to make it a better height on top of the mattress. Just a note for anyone who wants to be comfortable with the distance from top of the mattress to the ceiling. Not that I think it’s a bad plan, it’s a beautiful bed, but I’d personally prefer to have more room on top than underneath the bed.
Hi, would you happen to know how to adjust this to a full size bed size? Thanks!!
My daughter 12 fell in love with this bed. For Christmas her and her dad built it together for her Christmas present. Thank you for posting the plans !!
I built your loft bed last fall. I’m a single mom and built it with the help of my eight year old daughter. Thank you so much for the guidance. It came out awesome.
Would you by any chance have the step by step plans to make this loft bed a full size loft bed instead of a twin size? I love love love this “saving by design” project.
Thank you,
Anxious in Louisiana
You did a great job in the design, fabrication and installation instructions. I seem to work better with plans. Have you created a set of plans and a material list which I could purchase?
Bob
Thank you so very much for the plans for this bed!!! I’ve been searching and searching for a loft bed for my 13 yr old daughter and this fit the bill perfectly!!! I did make a few small changes to it. Since she’s 13 and a bit on the heavy side, I lowered the frame by 3 inches to 63″ instead of 66″. I also used 2x4s for the cleats instead of 2x2s for additional support and then went 1/2″ plywood with 1×4 slats on top of the plywood. This gave the underside that more finished look while also providing a bit more support than just the slats or plywood alone. For the ladder, instead of 2x2s screwed to the outside, I used a hole saw to cut 1″ holes in the 2x4s. Then ran 1″ dowels through the holes and put a screw in from the backside to hold it in place. Sanded the edges smooth and after painting, you can’t even tell how they’re made!! I also used left over 1×10 and made a little shelf attached to the top rail. She totally LOVES it!!!!! So again, thank you very much for these plans!!!!
I love this bed for my tween daughter, since she is more of a clothes lover than a book lover would it be possible to change one of the bookshelves into a dresser or wardrobe or even a makeup cabnet?
So, decided to build 3 of these for my kids. Learned a few things along the way.
1. Measure your ceilings. Mine are not 8′, they’re about 7 1/2, so I had to lower the beds down to 60″. It makes the underside a little bit cramped, but they would be too close to the ceiling if not that low.
2. If you are planning on building the bookshelves to go under the bed, it is WAY easier to start with them, then build the bed frame around them. I did the first one the way in the blog, then the second one with the bookshelves first, and it went way faster the second way.
am I able to order plans for this