It’s time to get ready for the fun holidays coming up! Decorating and doing these fun fall crafts for kids is how we welcome autumn in our home!
Fall is by far my favorite season of the year! Things are a little more hectic now that the kids are back in school and we’re settling into a new normal routine. As the temps start cooling down, it’s time to start getting ready for the fun holidays coming up. That includes decorating and doing lots of fun fall crafts for kids that get everyone excited for the change of seasons.
Frugal and Fun Fall Crafts for Kids
The following fall crafts are a few that I love to do with my own kids and they get the biggest kick out of creating their own festive works of art. They love them!
Leaf Wreath
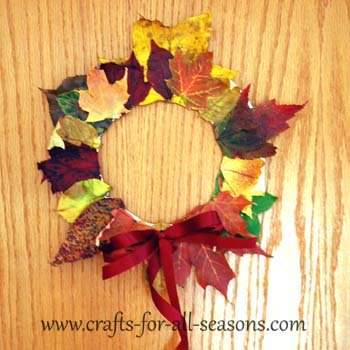
What better place to find some specific fall craft activities to do with the kids than by going to Crafts-For-All-Seasons.com?! They have some amazing crafts to do all year long, but this great leaf wreath for the fall is a favorite in our house! Once the leaves start falling, the kids love to go out and pick up their favorite ones. They find leaves of all different shapes and colors and we go over what type of tree they came from. It’s a great learning activity!
Then it’s time to take the leaves inside and make something with them. A wreath is super easy and the kids will love being able to put their leaf collection together on a pre-cut ring from a simple white paper plate. Glue the leaves onto the wreath and when you’re done, dress it up with a pretty bow. It’s perfect and they will love to show it off on a door or somewhere else around the house. Maybe their bedroom doors so everyone can see it each day!
Q-Tip Fall Tree
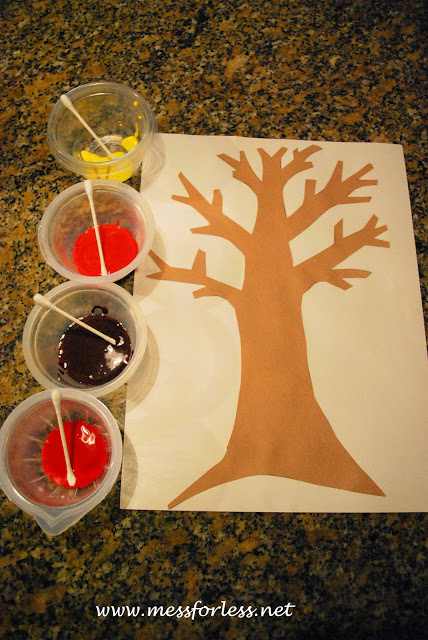
I don’t know about you, but when it comes to ANY kind of painting, my kids are in! So when I came across this cute fall tree that they can paint with Q-Tips from MessForLess.net, I knew it would be a hit!
Depending on how old your kids are, they may want to help cut out their bare tree from brown construction paper. Or, it may work better if you cut it out for them and glue it onto a white piece of paper. Once your bare tree is ready to be created into a beautiful fall tree of color, you can get the kids to work!
Set out different fall colored paint on the table for them in individual cups, give them some Q-Tips, and let them paint as many leaves as they want until their heart is content! They can paint leaves on the trees and leaves on the ground that have already fallen. Whatever they want, it’s their creation! And it’s a great way to improve their fine motor skills with having to hold the Q-Tip 😉
I love seeing what they come up with and seeing how they use the different colors to create their fall tree. They all have such unique looks and yet they are all perfect. What great fall decorations for around your house.
Marbled Fall Leaves with Shaving Cream
This is another super fun fall craft that the kids absolutely love! It can be a little messy, which of course, is right up their alley! I found this project over at TeachingWithTLC.com and I can’t say enough great things about it.
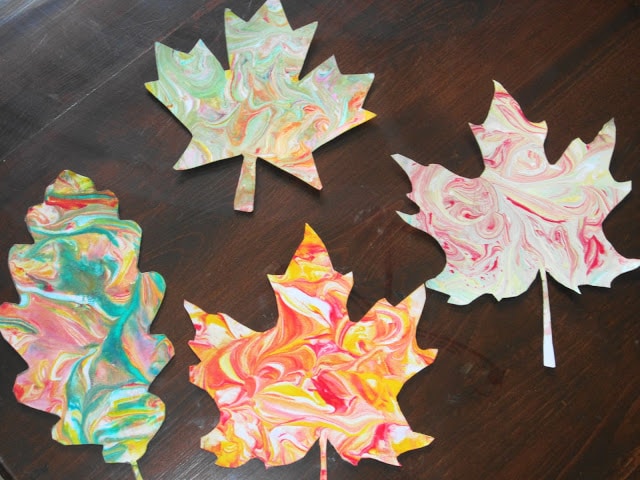
First, head on over to the website where I found my inspiration to get some great leaf templates! Print them, cut them out, and then half the battle is done. Next, it’s time to dig in and have fun with the shaving cream! Spread the shaving cream on a cookie sheet and grab some paint in the colors you are looking to use. Squirt the paint onto the shaving cream and start mixing it around with a spoon or toothpick.
Press your leaf into the mixed up painted shaving cream mess and make sure you get all of the corners covered with the colorful paints. I helped the kids get their leaves off of the mixture and let them sit for a couple minutes to make sure the paint covered them good.
Then it’s time for the fun part! Take a squeegee or towel (that you don’t mind ruining!) and take off all of the excess shaving cream. It leaves an awesome marbled effect that can’t be replicated. I love it and the kids get a HUGE kick out of their leaves that they painted!
The results are absolutely gorgeous and every single one is unique. Your children will never be able to create the same one, which is a great way to decorate the home. I love hanging their leaf creations from the mantle.
Tangled Pumpkins
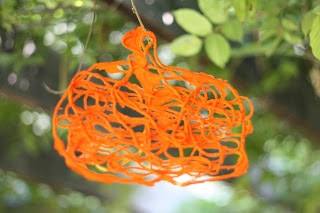
This one is a fun one to do with the kids and they love being able to see what happens to their yarn once the glue hardens and dries.
First, I couldn’t have done this without the great instructions over at ICanTeachMyChild.com. This project is SO much easier than it looks and their instructions worked great!
All you’ll need is some orange yarn, Elmer’s Glue, and wax paper. That’s it! On a cookie sheet, lay down a sheet of wax paper and free-hand a pumpkin template. Don’t worry about your art skills, just the basic shape will do!
Squeeze some glue onto the cookie sheet and get your yarn in it until it’s fully covered. Don’t cut the yarn anywhere, just keep moving it around in the glue so it’s soaked through.
Drape the yarn on the outline of the pumpkin you drew and follow your outline until your tangled mess of orange, glue-soaked yarn resembles a pumpkin.
Keep the kids’ creations on the wax paper where it can fully dry, preferably for a day or two. Once it’s dry, peel it from the wax paper and decorate as you see fit. Hang it on the window as a light catcher or add a magnet to the back for a cute fridge decoration.
Don’t waste another second…get started on some awesome fall crafts with the kids today! They are going to love the focused attention you give them and are going to be so proud of the fall creations that they come up with. And what better way to get excited about fall and all of the fun stuff that comes with it over the next few weeks!
Are you all pumped to do some specific fall crafts with the kids over the next month? Comment below and share what your fun DIY projects are going to be! 🙂


Leave a Reply